If you've ever delved into the world of vegan baking or sought innovative ways to reduce food waste in your kitchen, you've likely heard whispers of aquafaba. This humble liquid, often discarded without a second thought, has emerged as a truly remarkable vegan egg white substitute. While many first encounter it as the liquid drained from a can of chickpeas, learning how to make aquafaba from scratch unlocks a world of benefits: it’s more cost-effective, significantly reduces waste, and gives you ultimate control over its consistency and purity. Think of it as a small kitchen hack that delivers truly life-changing results for your culinary adventures.
Aquafaba, literally meaning "bean water" in Latin (aqua = water, faba = bean), is the starchy, viscous liquid that remains after cooking legumes like chickpeas. What makes this unassuming liquid so extraordinary is its uncanny ability to mimic the properties of egg whites. It whips into glorious stiff peaks, emulsifies beautifully for creamy sauces, and acts as a superb binder in countless recipes. From airy meringues and decadent chocolate mousse to silky smooth mayonnaise and even frothy cocktails, aquafaba has firmly cemented its place as a vegan kitchen essential.
While canned aquafaba is convenient, mastering how to make aquafaba at home from dry chickpeas offers a superior product. You eliminate concerns about added sodium, preservatives, or BPA linings sometimes found in cans. Plus, it’s incredibly satisfying to transform simple dried beans into such a versatile ingredient. Today, we'll guide you through the straightforward process of creating perfect homemade aquafaba, leveraging the efficiency of an Instant Pot for consistent, high-quality results.
Why Homemade Aquafaba is a Game-Changer (and Why the Instant Pot Reigns Supreme)
The journey to embracing aquafaba often begins with that curious liquid from a chickpea can. But for those committed to a plant-based lifestyle, a zero-waste kitchen, or simply culinary excellence, making aquafaba from scratch is a logical and rewarding next step. It’s not just about saving a few pennies; it's about control, quality, and sustainability.
- Cost-Effectiveness: Dry chickpeas are significantly cheaper per serving than their canned counterparts. When you make aquafaba at home, you’re essentially getting a premium ingredient for a fraction of the cost.
- Zero-Waste: Instead of buying chickpeas solely for the liquid (and then having a can of chickpeas you might not immediately need), you cook your own. The beans themselves become a delicious meal component for hummus, salads, or curries, and the cooking liquid becomes your precious aquafaba. Every part of the chickpea is utilized!
- Purity and Control: When you make your own, you control the ingredients entirely. No added salt (crucial for sweet recipes!), no preservatives, and no worries about canning process by-products. You can also adjust the consistency of your aquafaba to suit different recipes.
Now, while you can make aquafaba on the stovetop, the process can be lengthy and inconsistent. This is where the Instant Pot (or any electric pressure cooker) becomes your best friend. For a comprehensive look into this method, check out our guide on Instant Pot Aquafaba: Make Perfect Vegan Egg Replacer from Dry Chickpeas.
The Instant Pot Advantage for Aquafaba Production:
- Time-Saving: Dry chickpeas go from rock-hard to perfectly cooked in under an hour, dramatically cutting down the cooking time compared to traditional stovetop methods.
- Consistent Results: Pressure cooking locks in starch and flavor, leading to a richer, more consistently thick aquafaba. No more watery batches!
- Customizable Thickness: With precise water-to-bean ratios, you can tailor your aquafaba's consistency, whether you need it thick for meringues or slightly thinner for emulsifications.
- Effortless Batch Cooking: You can easily cook a large batch of chickpeas for various meals throughout the week, simultaneously generating a generous supply of aquafaba for your baking needs.
Step-by-Step Guide: How to Make Aquafaba with Your Instant Pot
Ready to unlock the magic? Here's exactly how to make aquafaba using dry chickpeas and your Instant Pot. This method ensures a reliable, high-quality product every time.
Equipment and Ingredients:
- 250 g dry chickpeas (approximately 1 heaping cup)
- 1 liter fresh water (for pressure cooking)
- An Instant Pot or electric pressure cooker
- A fine mesh sieve or cheesecloth
- A large bowl
- An airtight jar or container for storage
- Optional: A pinch of salt (omit if primarily using for sweet recipes)
The Process:
1. Rinse Your Chickpeas
Start by giving your dry chickpeas a thorough rinse under cold running water. This removes any dust, debris, or starches from the surface. While soaking is optional for Instant Pot cooking, we highly recommend it. Soaking for 8-12 hours (or overnight) helps the chickpeas cook more evenly, resulting in a creamier texture for both the beans and your aquafaba. If you forget to soak, don't worry – the Instant Pot can still handle them; you'll just need to adjust the cooking time.
2. Add Chickpeas and Water to the Instant Pot
If you've soaked your chickpeas, make sure to drain and discard the soaking water first. Place the rinsed chickpeas into the inner pot of your Instant Pot. Now, add 1 liter of fresh water. This 1 liter of water to 250 g of dry chickpeas is a sweet spot ratio that typically yields perfectly cooked beans and a rich, starchy aquafaba. Using too much water will result in a watery aquafaba that struggles to whip, while too little could cause the beans to scorch or not cook thoroughly. Stick to this ratio until you've gained confidence in adjusting it to your preference.
3. Pressure Cook the Chickpeas
Close the Instant Pot lid and ensure the vent is sealed.
- For pre-soaked chickpeas: Cook on High Pressure for 25-30 minutes.
- For unsoaked chickpeas: Cook on High Pressure for 40-45 minutes.
4. Cool and Separate the Aquafaba
Once the pressure is fully released, carefully open the lid. You'll see your perfectly cooked chickpeas submerged in a cloudy, slightly thickened liquid – that's your nascent aquafaba! Do not drain the liquid immediately. For the best aquafaba, it's essential to let the chickpeas cool down completely in their cooking liquid. This allows the beans to continue releasing their starches and proteins into the water, further enriching the aquafaba's consistency. You can let it cool on the counter for a few hours or even overnight in the refrigerator.
Once completely cool, use a fine mesh sieve or a cheesecloth-lined colander to separate the chickpeas from the aquafaba. Resist the urge to press on the chickpeas, as this can introduce too much bean pulp into your aquafaba, affecting its texture and purity. Simply let the liquid drain naturally.
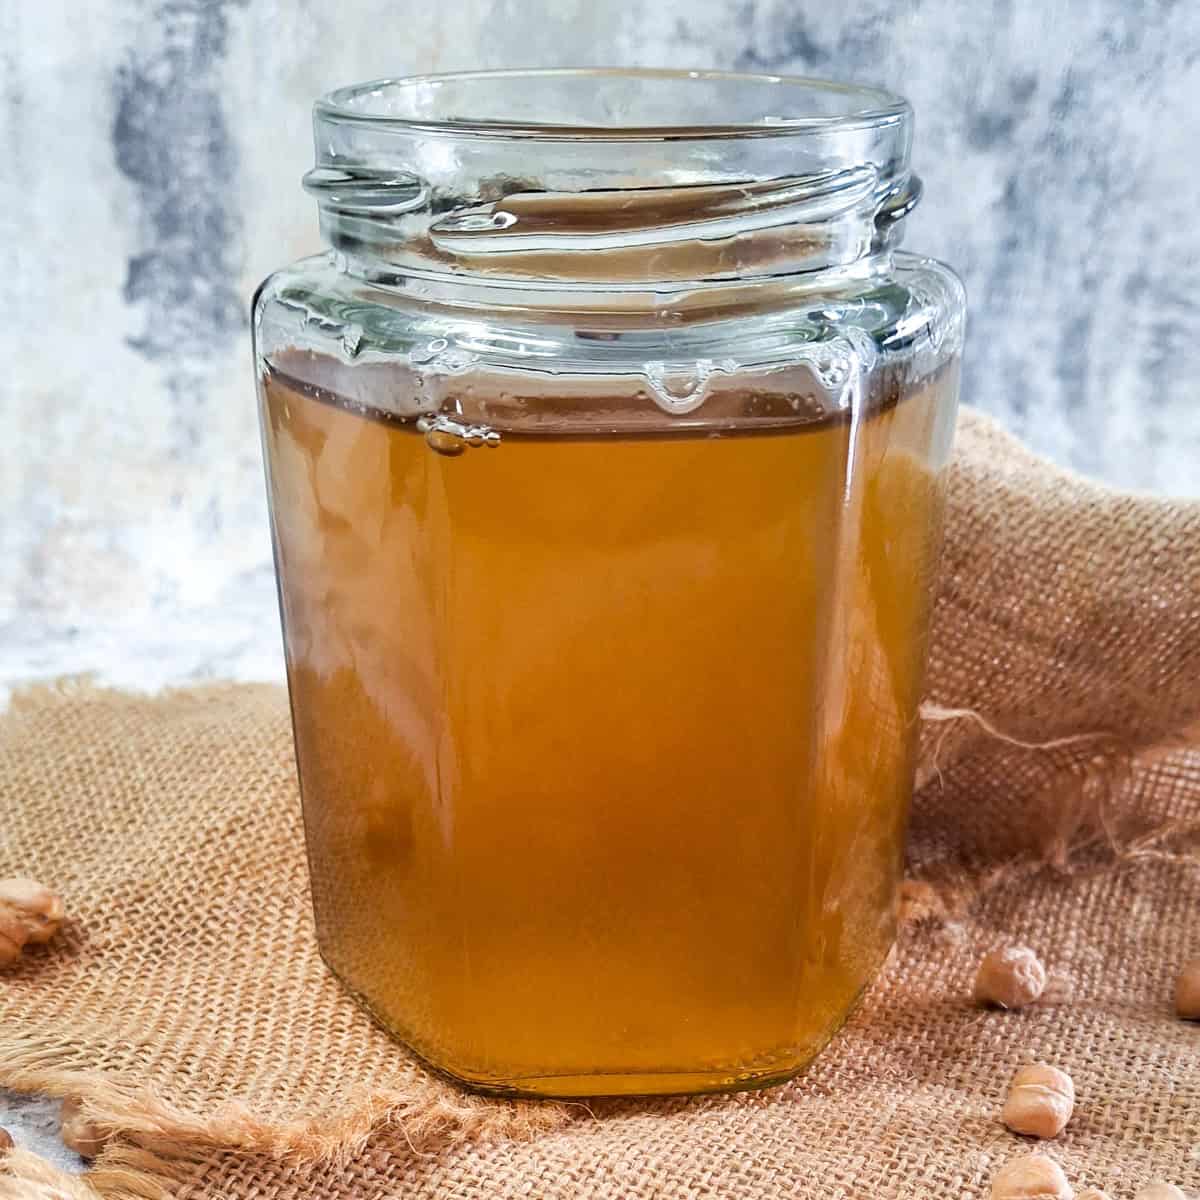
5. Store Your Homemade Aquafaba
Pour your beautiful, homemade aquafaba into a clean, airtight jar or container. It can be stored in the refrigerator for up to 5-7 days. For longer storage, aquafaba freezes exceptionally well. Pour it into ice cube trays for convenient, pre-portioned amounts, or into larger freezer-safe containers. Frozen aquafaba can last for several months.
Tips for Perfect Homemade Aquafaba and Its Many Uses
Mastering how to make aquafaba is just the beginning. Here are some extra insights to elevate your experience:
- Consistency is Key: If your aquafaba seems too thin after cooling, you can gently reduce it on the stovetop over low heat until it reaches a consistency similar to egg whites. Be careful not to over-reduce, as it can become too thick and syrupy.
- No Salt for Sweet Dishes: If you plan to make meringues, mousses, or other sweet treats, it's best to omit salt during the chickpea cooking process. Salt can impact the flavor profile of delicate desserts.
- Experiment with Legumes: While chickpeas yield the most consistent and widely used aquafaba, you can also experiment with other white beans like cannellini beans. Avoid darker beans, as their color might be undesirable in some recipes.
- Don't Waste the Beans: Remember, you now have a batch of perfectly cooked chickpeas! Use them to whip up creamy hummus, add to salads, create hearty curries, or even roast them for a crunchy snack.
Once you have a supply of this versatile liquid, the culinary possibilities are endless. Beyond the well-known meringues and mayonnaise, aquafaba shines in vegan butter, frothy cocktail toppers, savory quiches, and as an incredible binder in gluten-free baking. It truly is a testament to resourceful cooking and the power of plants.
Conclusion
Learning how to make aquafaba from scratch is more than just a recipe; it's an embrace of cost-effectiveness, zero-waste living, and delicious vegan innovation. With the reliability of an Instant Pot, turning dry chickpeas into this incredible egg white replacer is a simple, rewarding process that yields superior results compared to its canned counterpart. So, ditch the discarded liquid, grab your dry chickpeas, and prepare to be amazed by the culinary magic of homemade aquafaba. Your plant-based kitchen (and your wallet!) will thank you.
