Instant Pot Aquafaba: Unlock the Magic of Homemade Vegan Egg Replacer
If you're delving into the world of vegan baking, exploring egg-free alternatives, or simply a culinary enthusiast always on the lookout for innovative kitchen hacks, learning
how to make aquafaba from scratch is a game-changer. This humble liquid, often discarded after cooking chickpeas, is a true marvel, mimicking the properties of egg whites with surprising accuracy. While many first encounter aquafaba from canned chickpeas, taking the step to create your own from dry chickpeas using an Instant Pot elevates the experience. It’s not just more cost-effective and zero-waste; it offers a cleaner, purer product with superior consistency. Get ready to transform your plant-based cooking and baking as we guide you through mastering perfect Instant Pot aquafaba.
What Exactly is Aquafaba and Why is it a Vegan Kitchen Essential?
The word "aquafaba" itself is a straightforward blend of Latin terms: "aqua" for water and "faba" for bean. Essentially, it's the starchy, viscous liquid left behind after cooking legumes, most commonly chickpeas. What makes this unassuming bean water so extraordinary is its remarkable functional properties that closely parallel those of egg whites.
Aquafaba can:
- Whip into stiff peaks: Just like egg whites, it transforms into airy, stable meringues, mousses, and whipped creams.
- Emulsify beautifully: It forms the base for creamy vegan mayonnaise, aioli, and other dressings.
- Act as a binder: It provides structure and moisture in baked goods, from cookies and cakes to savory dishes.
This versatility has catapulted aquafaba from a forgotten byproduct to a staple in vegan and allergen-friendly kitchens worldwide. Imagine fluffy lemon meringues, rich chocolate mousse, or perfectly chewy macarons, all made entirely without eggs. Understanding
how to make aquafaba opens up a universe of culinary possibilities, making it an indispensable ingredient for anyone exploring plant-based living. The magic lies in its unique composition of proteins and starches that provide both emulsifying and foaming capabilities.
Why the Instant Pot is Your Best Friend for Perfect Aquafaba
While you can make aquafaba on the stovetop, the Instant Pot offers a distinct advantage, especially when starting with dry chickpeas. This versatile electric pressure cooker streamlines the process, ensuring consistent, high-quality results every time.
Here's why the Instant Pot is the superior method:
- Significant Time Savings: Cooking dry chickpeas on the stovetop can take several hours of simmering and monitoring. With an Instant Pot, chickpeas go from dry to perfectly cooked in under an hour of active cooking time, plus natural release. This drastically cuts down on kitchen time and effort.
- Unmatched Consistency: Pressure cooking creates a sealed, high-pressure environment that locks in flavor and starch more effectively. This results in a richer, thicker, and more consistently potent aquafaba compared to the evaporation-prone stovetop method, where results can vary widely.
- Precise Thickness Control: The Instant Pot allows you to easily control the water-to-bean ratio. This means you can tailor the thickness of your aquafaba to suit your specific needs, whether you want a thinner liquid for dressings or a super-concentrated version for meringues. Once you master the basic ratio, you can fine-tune it.
- Batch Cooking Efficiency: Making aquafaba in the Instant Pot means you're also cooking a batch of perfectly tender chickpeas. You can effortlessly prepare enough chickpeas for weekly meals – think hummus, salads, curries, or roasting – while simultaneously producing a generous supply of aquafaba for your baking projects. It's a true two-for-one culinary win, embracing zero-waste principles.
The "set it and forget it" nature of the Instant Pot removes the guesswork and constant tending often associated with traditional methods, making the process of making aquafaba from scratch accessible and enjoyable for even beginner cooks.
Gather Your Essentials: Ingredients and Equipment
Before diving into the steps, ensure you have these items ready:
- Dry Chickpeas: 250 g (approximately 1 heaping cup). Opt for fresh, good-quality chickpeas for the best results. Organic chickpeas can sometimes yield a slightly cleaner aquafaba.
- Water: 1 litre (for pressure cooking). Use filtered water if your tap water has a strong mineral taste.
- Instant Pot or Electric Pressure Cooker: Your star appliance for this recipe.
- Fine-Mesh Sieve or Cheesecloth: Essential for separating the aquafaba from the cooked chickpeas.
- Large Bowl: To collect the strained aquafaba.
- Airtight Jar or Container: For storing your finished aquafaba.
- Optional: A pinch of salt. While a tiny bit of salt can enhance savory applications, it's best omitted if your primary use for the aquafaba will be in sweet recipes, as it can sometimes interfere with whipping or flavor.
Step-by-Step Guide: How to Make Aquafaba in Your Instant Pot
Now for the practical part: learning
how to make aquafaba that's ready to transform your vegan recipes. Follow these simple steps for consistent success.
Step 1: Rinse and (Optional) Soak Your Chickpeas
Start by giving your dry chickpeas a thorough rinse under cold running water. This removes any dust, debris, or starches from the surface. While soaking is traditionally a prerequisite for cooking legumes, it's actually optional with an Instant Pot. However, soaking your chickpeas for 8-12 hours (or overnight) offers distinct advantages: it helps them cook more evenly, reduces potential digestive discomfort, and often contributes to a creamier final aquafaba. If you forget to soak, don't worry! You can still cook them directly from dry in the Instant Pot; you'll just need to adjust the cooking time.
Step 2: Add Chickpeas and Water to the Instant Pot
If you soaked your chickpeas, drain and discard the soaking water. Place the rinsed (and optionally soaked) chickpeas into the inner pot of your Instant Pot. Add precisely 1 litre of fresh water. This 250g chickpeas to 1 litre water ratio is crucial for achieving a balanced aquafaba – thick and starchy without being overly viscous, and producing tender, perfectly cooked beans. Using too much water will dilute your aquafaba, resulting in a thin, watery consistency that struggles to whip. Conversely, too little water risks the beans scorching and the aquafaba becoming overly concentrated or even burning. Stick to this ratio initially; you can always fine-tune it slightly in future batches once you've gauged your desired consistency.
Step 3: Pressure Cook to Perfection
Secure the lid on your Instant Pot, ensure the sealing vent is closed, and set it to the following:
- For Soaked Chickpeas: Cook on High Pressure for 25-30 minutes, followed by a Natural Pressure Release (NPR) for 15 minutes.
- For Unsoaked Chickpeas: Cook on High Pressure for 45 minutes, followed by a Natural Pressure Release (NPR) for 20 minutes.
Natural Pressure Release is vital here. It allows the pressure to drop slowly, preventing the beans from bursting and ensuring they cook thoroughly, while also allowing the liquid to cool gradually and thicken as starches are released back into the water. Once the pressure has fully released, carefully open the lid. The chickpeas should be very tender, almost mashable, and the liquid should look noticeably starchy.
Step 4: The Separation and Cooling Phase
This is arguably the most critical step for optimal aquafaba consistency. Do NOT drain the chickpeas immediately. Instead, allow the chickpeas and their liquid to cool completely together inside the Instant Pot, uncovered, for several hours or even overnight. As the mixture cools, the starches and proteins continue to leach into the liquid, contributing to its thickness and egg-like properties. Attempting to separate the aquafaba while hot will result in a much thinner, less effective product.
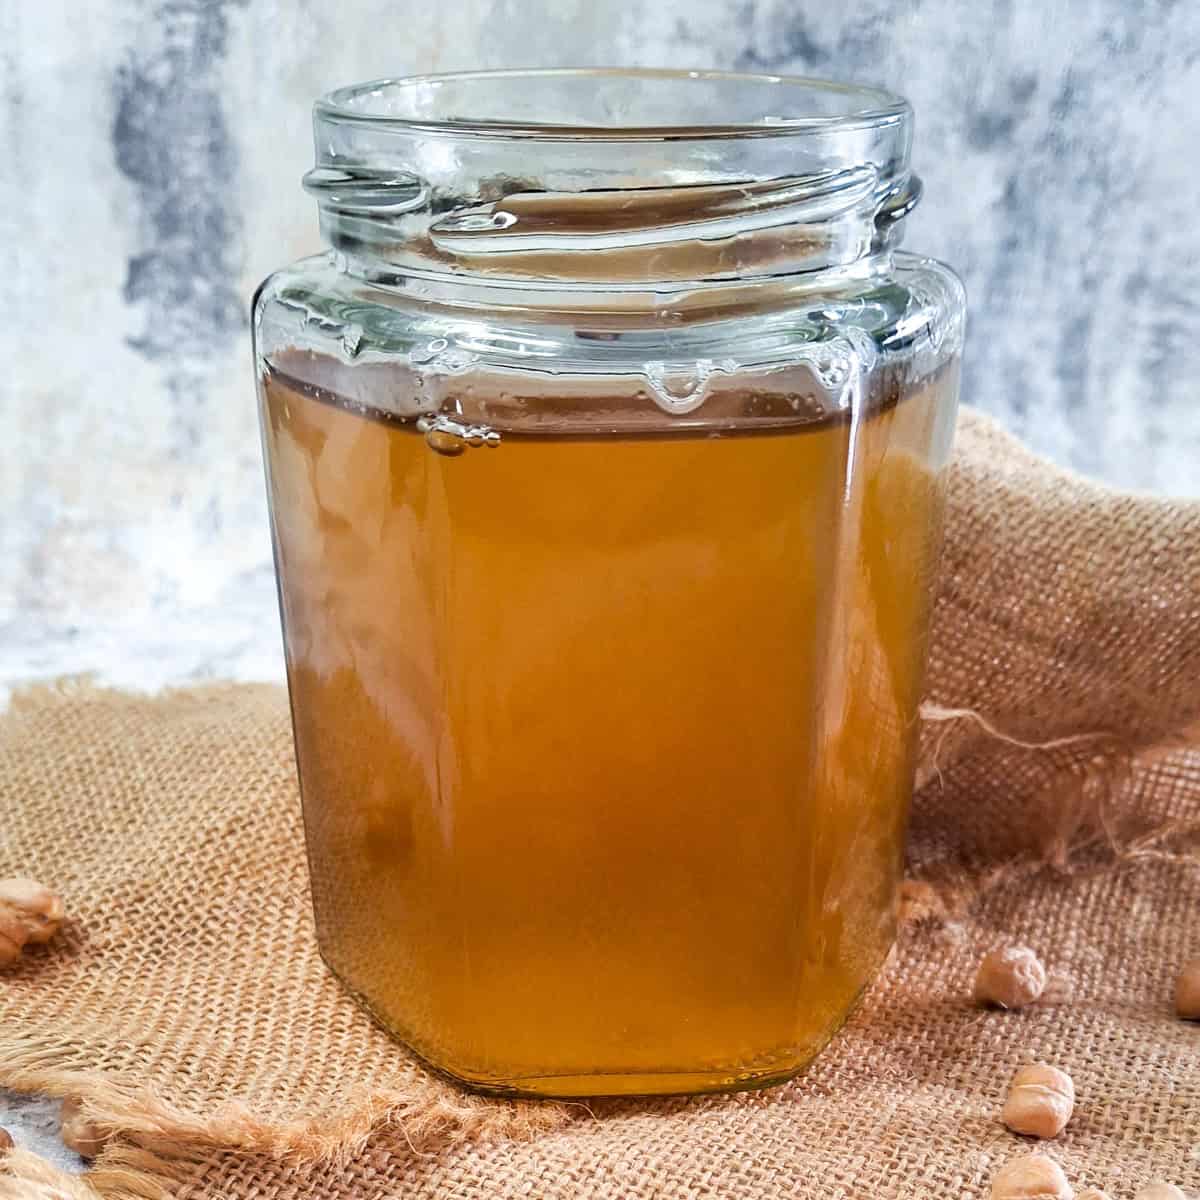
Once fully cooled, carefully strain the chickpeas through a fine-mesh sieve set over a large bowl. You can gently press on the chickpeas with a spoon to extract any remaining liquid, but avoid mashing them, which could introduce undesirable solids. The liquid collected in the bowl is your precious homemade aquafaba.
Step 5: Storage and Usage
Transfer your freshly made aquafaba into an airtight jar or container. It can be stored in the refrigerator for up to 5-7 days. For longer storage, you can freeze aquafaba in ice cube trays. Once frozen, transfer the cubes to a freezer-safe bag for up to 3-6 months. When ready to use, thaw the desired amount in the refrigerator.
As a general guideline for usage, 3 tablespoons of aquafaba is typically equivalent to one whole egg, while 2 tablespoons equals one egg white. However, for specific recipes, always refer to the recipe's recommended aquafaba amount.
Maximizing Your Homemade Aquafaba: Expert Tips for Success
Even with a reliable recipe, a few extra tips can help you achieve consistent, high-performing aquafaba every time.
- Assess Consistency: Once cooled, your aquafaba should have a slightly viscous, somewhat slimy texture, similar to egg whites or a thin jelly. If it's too thin, you can gently reduce it further in a saucepan over low heat until it reaches the desired consistency, being careful not to over-thicken. If it's too thick, a tiny bit of water can be stirred in to loosen it.
- The Foaming Test: A simple way to check if your aquafaba is ready for whipping is to whisk a small amount vigorously in a bowl. It should start to foam and hold soft peaks within a minute or two. If it remains watery, it might need further reduction.
- Salt Considerations: As mentioned, omitting salt during the cooking process provides maximum versatility for sweet applications. If you only plan to use your aquafaba for savory dishes like mayo, a small pinch of salt during cooking is fine.
- Chickpea Variety Matters: While most standard dry chickpeas will work, slight variations in starch content between brands or types can subtly affect your aquafaba. Don't be afraid to experiment if your first batch isn't exactly as you envisioned.
- Clean Equipment for Whipping: When it comes time to whip your aquafaba for meringues or mousse, ensure your mixing bowl and whisk attachments are immaculately clean and grease-free. Any trace of oil can prevent it from whipping properly, just like with egg whites.
Embrace the Versatility of Instant Pot Aquafaba
Mastering
how to make aquafaba from dry chickpeas in your Instant Pot is more than just a recipe; it's an empowering skill for anyone on a vegan or egg-free journey. You're not only creating a powerful, cost-effective, and zero-waste egg replacer, but you're also producing perfectly cooked chickpeas for a multitude of other meals. From delicate meringues and rich chocolate mousses to creamy mayonnaise and fluffy pancakes, the culinary possibilities are endless. So, grab your Instant Pot, some dry chickpeas, and prepare to unlock a new level of plant-based deliciousness in your kitchen!