Rookie Guide: Make Aquafaba from Scratch for Vegan Baking
Learning how to make aquafaba from scratch is one of those kitchen revelations that feels truly transformative, especially if you navigate the world of vegan, egg-free, or allergy-friendly cooking. This humble, often overlooked liquid has become a cornerstone of plant-based cuisine, offering incredible versatility as a vegan egg white replacement. If you’ve ever cracked open a can of chickpeas and poured away the viscous liquid, you’ve encountered aquafaba. Its name, derived from the Latin words aqua (water) and faba (bean), literally translates to "bean water." This thick, starchy liquid is what remains after cooking chickpeas or other legumes, and its magic lies in its uncanny ability to mimic egg whites. Aquafaba can be whipped into ethereal stiff peaks, emulsified into creamy sauces, and used as a reliable binder in a myriad of baked goods. From cloud-like meringues and rich chocolate mousse to silky mayonnaise and even sophisticated cocktails, aquafaba has firmly cemented its place as a vegan kitchen essential. While many first experiment with aquafaba harvested from canned chickpeas, making your own from dry chickpeas offers significant advantages. It’s far more cost-effective, champions a zero-waste philosophy by utilizing every part of the bean, and allows for greater control over the final product's purity and consistency. Today, we'll demystify the process of how to make perfect aquafaba using dry chickpeas and the ever-reliable Instant Pot, ensuring you get consistent, high-quality results every time. For a deeper dive into the specific advantages, you might want to explore why Homemade Aquafaba is the Cost-Effective, Zero-Waste Vegan Egg White.Why Use an Instant Pot for Homemade Aquafaba?
While stovetop methods for cooking chickpeas and making aquafaba are certainly viable, they can be time-consuming and often require more hands-on attention to achieve the desired liquid consistency. This is where the Instant Pot shines, transforming a potentially lengthy process into a convenient and reliable one. * Time-Saving Efficiency: The Instant Pot significantly cuts down cooking time, taking dry chickpeas to perfectly cooked in under an hour, a fraction of the time a traditional stovetop method would require. * Consistent Results: Pressure cooking locks in flavor and starch, leading to a richer, more consistently thick aquafaba. The sealed environment prevents excessive evaporation, which can dilute the liquid's potency. * Customized Thickness: You have precise control over the aquafaba's final thickness by adjusting the water-to-bean ratio. This allows you to tailor your aquafaba for specific recipes, whether you need a thinner consistency for binding or a thicker one for whipping. * Batch Cooking Benefits: An Instant Pot makes it easy to cook a large batch of chickpeas for various culinary uses – think salads, curries, hummus, or savory stews – while simultaneously yielding a generous supply of premium aquafaba for your vegan baking adventures. This duality makes it an incredibly efficient kitchen tool. If you're keen on mastering this technique, our article on Instant Pot Aquafaba: Make Perfect Vegan Egg Replacer from Dry Chickpeas provides even more specialized tips.Ingredients and Equipment You'll Need
Gathering your tools and ingredients before you start makes the process seamless. Here’s what you’ll need to make aquafaba from scratch:- Dry Chickpeas: 250 grams (approximately 1 heaping cup). Opt for good quality, fresh chickpeas for the best results.
- Water: 1 liter (about 4 cups) for pressure cooking. Filtered water is always a good choice.
- Instant Pot or Electric Pressure Cooker: Any model will work effectively.
- Fine Mesh Sieve or Cheesecloth: Essential for separating the liquid from the cooked chickpeas.
- Large Bowl: To collect the aquafaba.
- Airtight Jar or Container: For convenient storage of your homemade aquafaba.
- Optional: Pinch of Salt: A tiny bit of salt can enhance flavor in savory applications. However, if your primary goal is aquafaba for sweet recipes like meringues or whipped cream, it’s best to omit the salt for a neutral taste.
Step-by-Step Guide: How to Make Aquafaba in Your Instant Pot
Follow these simple steps to create perfect, high-quality aquafaba ready for all your vegan baking needs.1. Rinse and Optionally Soak Your Chickpeas
Begin by giving your dry chickpeas a thorough rinse under cold running water. This removes any dust, debris, or starches from the surface. While soaking is optional when using an Instant Pot, we highly recommend it for optimal results. Soaking chickpeas for 8-12 hours (or overnight) helps them cook more evenly and contributes to a creamier, thicker aquafaba. It also typically reduces the overall cooking time. If you forget to soak, don't worry! The Instant Pot can cook chickpeas straight from dry; you’ll just need to adjust the cooking time accordingly.
2. Add Chickpeas and Water to the Instant Pot
If you've soaked your chickpeas, drain and discard the soaking water. Place the rinsed (or drained, if soaked) chickpeas into the inner pot of your Instant Pot. Now, add 1 liter (about 4 cups) of fresh water. This 1:4 (chickpea-to-water) ratio is crucial. It’s generally considered the sweet spot for achieving both perfectly cooked beans and a rich, starchy aquafaba. Using too much water will result in a watery aquafaba that struggles to whip, while too little water risks the beans scorching and yielding insufficient liquid. Stick to this ratio initially until you've gained a feel for how it works with your specific chickpeas and Instant Pot.
3. Pressure Cook the Chickpeas
Secure the lid on your Instant Pot, ensuring the vent is sealed.
- For Soaked Chickpeas: Select the "Pressure Cook" or "Manual" setting and cook on High Pressure for 25-30 minutes. Once cooking is complete, allow a Natural Release (NR) for at least 15 minutes.
- For Unsoaked Chickpeas: Select the "Pressure Cook" or "Manual" setting and cook on High Pressure for 40-50 minutes. Follow this with a Natural Release (NR) for 20 minutes or until the float valve drops.
Natural release is vital as it allows the pressure to drop slowly, preventing the beans from bursting and ensuring the starches fully release into the liquid, contributing to a thicker aquafaba. After the specified natural release time, you can carefully turn the vent to "Venting" to quick release any remaining pressure.
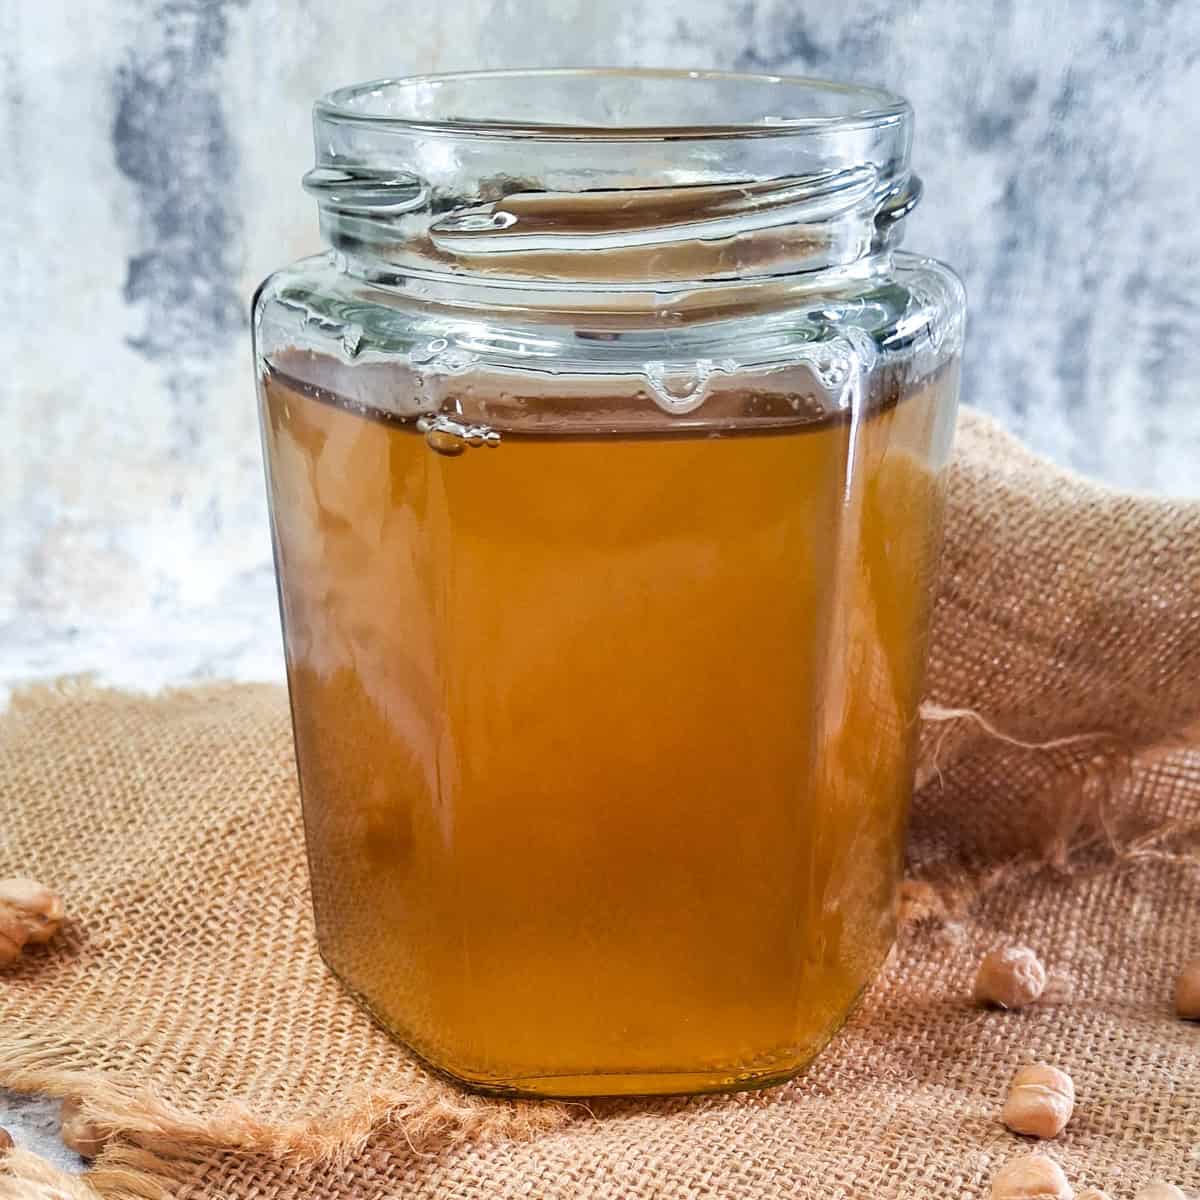
4. Cool Completely and Strain
Once the pressure has fully released, carefully open the Instant Pot lid. The most critical step for achieving thick aquafaba is to let the chickpeas and their liquid cool completely within the pot. This cooling period allows the starch to continue concentrating and the liquid to thicken significantly. Do not rush this process by straining immediately after cooking; patience here is key! Once completely cool (ideally for several hours or overnight), place a fine mesh sieve or cheesecloth over a large bowl and carefully pour the contents of the Instant Pot through it. The liquid collected in the bowl is your aquafaba.
